Skip to main content
Owens Corning
Browse All Shingles
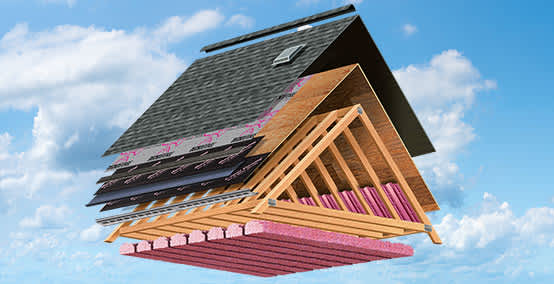
Duration®
Shingles
Duration®
Designer Shingles
Oakridge®
Shingles
Hip and Ridge Shingles
Starter Shingles
Ice and Water Barrier
Synthetic Underlayment
Titanium®
and
RhinoRoof®
Exhaust Ventilation
Explore All Components
SureNail®
Technology
Nailing Zone Performance
StreakGuard™
Algae Protection
Warranty Overview
Install Instructions
Where to Buy
Design & Inspire
Style Boards
new
new
new
Commercial Insulation Home Page
View All Products
Walls
Foundations
Roof and Roof Decks
Ceilings
Interior Acoustics
PINK®
Fiberglas®
Insulation
FOAMULAR®
NGX™
XPS
Thermafiber®
Mineral Wool
Rainbarrier Continuous Insulation
All Products
Document Library - Canada
Tools and Calculators
LEED®
Credit Request
Connect with Building Science Team - Canada
Residential Insulation Home Page
View All Products
Attics
Floors
Walls
Basements & Crawl Spaces
Air Sealing
PINK®
Fiberglas®
Insulation
FOAMULAR®
NGX™
XPS
AttiCat®
Loosefill
All Products
Dealer Locator
Contact Us
Full Document Library
FIBERGLAS®
Insulation
FOAMULAR®
NGX™
THERMAFIBER®
Mineral Wool Insulation
Insulation Accessories
Roofing
Architectural Guide
Continuing Education
Sustainability &
LEED®
Technical Video Library
Thermal Bridging Playbook
Effective Thermal Resistance Calculator
Acoustic Assemblies Design Calculator
QuietZone Savings Calculator
Owens Corning
Hamburger Menu
Back
new
new
Back
Back
Roofing
Install Instructions